
A home renovation rarely fails all at once. Instead, it derails a little at a time, an unexpected cost here, a delayed decision there, until the original budget is a distant memory. Understanding exactly where these overruns come from is the best way to prevent them, or at least keep them from sinking your project entirely. This article breaks down the most common budget-busting culprits in home improvement projects and how to plan around them before you sign a single contract.
Hidden Structural Problems Discovered After Demolition
Many budget overruns start the moment a wall comes down or old flooring gets pulled up. Contractors frequently find water damage, outdated wiring, or rot that was completely invisible during the estimate phase. Because these issues cannot be diagnosed until the project is already underway, homeowners are often forced into unplanned spending mid-renovation. This is one of the most common reasons a project that started on budget ends up costing thousands more than expected.
The best defense is a thorough pre-project inspection, even if it costs a little extra upfront. A licensed inspector can flag warning signs like sagging floors, musty odors, or uneven walls before demolition begins. While not every hidden problem can be caught in advance, a good inspection dramatically reduces the odds of a nasty surprise.
Roofing Repairs That Balloon Beyond the Original Estimate

Roofing projects are notorious for growing in scope once work begins. What starts as a simple shingle replacement can turn into a full deck repair if the underlying plywood is soft or water-damaged, and this kind of hidden damage often isn’t visible until the old shingles are stripped away. Rotted decking, damaged flashing, or unexpected mold can each add anywhere from a few hundred to several thousand dollars to the final bill, depending on how much of the roof is affected. Homeowners working with a Residential Roofing crew should ask upfront how the contractor handles unexpected decking issues and whether those costs are itemized separately from labor. A trustworthy contractor will typically inspect the roof deck before finalizing a quote and build in a contingency line, often 10 to 15 percent of the total project cost, to cover surprises without derailing the budget. It also helps to ask how pricing is structured for replacement plywood, since some contractors charge per sheet while others fold it into a flat day rate. Getting this in writing before the tear-off begins gives homeowners a clearer picture of worst-case costs and prevents mid-project sticker shock when the crew uncovers problems beneath the surface.
Storm-related damage adds another layer of unpredictability. If a project is prompted by a recent storm, hail damage repair often uncovers bruised shingles, damaged flashing, or compromised vents that were not visible from the ground. What looks like a straightforward $4,000 patch job can quickly turn into an $8,000 roof section replacement once the crew pulls back the shingles and finds soft decking underneath. The trouble is that much of this damage is only detectable once the roofing crew is actually on-site with the old material removed. Granular bruising on asphalt shingles, cracked pipe boots, and rusted nail heads are easy to miss during a ground-level or even a ladder inspection. Insurance adjusters and contractors don’t always agree on the scope either, which can leave homeowners caught between two estimates while the meter is running on labor. Getting a detailed written estimate that separates cosmetic repairs from structural ones helps homeowners avoid surprise change orders later in the process. A solid estimate should also spell out a per-square-foot rate for any decking replacement, since that’s the line item most likely to expand once work begins. Asking the contractor to document damage with photos before covering it back up gives homeowners a paper trail for insurance claims and protects against disputed charges.
- Ask for a line-item quote that separates materials, labor, and contingency costs, so you can see exactly where a change order is padding the bill
- Request photos of any damage found once old roofing material is removed, especially rot, mold, or water staining on the decking
- Confirm whether the estimate already accounts for potential decking replacement, and ask for a per-sheet price (typically $50–$80 installed) in case more is needed
- Clarify how insurance claims factor into the final invoice, including who submits the supplement request for hidden damage
- Get a cap on contingency costs, ideally 10-15% of the total, so “unforeseen issues” can’t justify unlimited overages
- Ask what happens if flashing, fascia, or gutters need replacing mid-job, since these are common add-ons contractors quote separately
Siding Projects That Reveal Water Intrusion and Rot
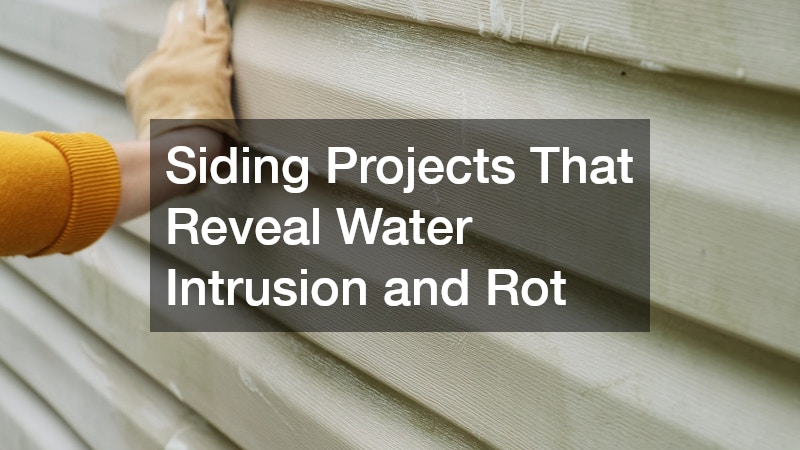
Exterior siding work often uncovers problems that were quietly developing behind the walls for years. A siding contractor may find soft sheathing, mold, or insect damage once old panels are removed, all of which add labor and material costs that were not part of the original bid. Because siding protects the entire building envelope, skipping these repairs to save money can lead to far more expensive damage down the road.
Homeowners can reduce the risk of overruns by asking contractors to physically probe a few sections of siding before the estimate is finalized. This simple step, using a screwdriver or moisture meter, can reveal soft spots that indicate underlying damage. It will not catch everything, but it gives a more realistic starting budget than a purely visual walkthrough.
Mechanical Systems That Fail Once Walls Are Opened
Renovation work often brings old mechanical systems out of hiding, and not in a good way. A kitchen remodel might reveal that ductwork is undersized or that an aging furnace cannot support a new layout, pushing homeowners into an unplanned HVAC replacement mid-project. Because heating and cooling systems are expensive and tightly regulated by local codes, this kind of discovery can add a substantial line item to a budget that had no room for it.
The smartest move is to have a mechanical contractor assess major systems before renovation begins, especially if the home is more than twenty years old. This proactive step either confirms the system can handle the new layout or gives homeowners a chance to budget for replacement in advance rather than being blindsided partway through construction.
Basement and Foundation Work That Exposes Drainage Issues
Basement remodels are especially prone to scope creep because moisture problems are often invisible until finishing work begins. Once drywall comes down or old flooring is pulled up, contractors frequently find efflorescence, musty subfloor smells, or damp insulation that signal a chronic water intrusion problem rather than a one-time leak. These discoveries almost always happen after the budget has already been set, leaving homeowners to make quick decisions with little room to shop around for pricing. Contractors may discover that a home needs sump pump installation to keep a newly finished space dry, particularly in regions with high water tables or heavy seasonal rain. A basic sump pump system can run $1,000 to $3,000 installed, but costs climb quickly if it requires trenching through concrete, adding a battery backup, or tying into an existing French drain. In more severe cases, exterior grading corrections or a full perimeter drainage system may be recommended, adding thousands more to the original estimate. Skipping this step to save money upfront often leads to far costlier water damage claims later. Warped flooring, mold remediation, and ruined drywall can easily exceed the original cost of proper drainage work, and many homeowners insurance policies exclude gradual water damage entirely. Budgeting a contingency of 15-20% specifically for below-grade projects gives homeowners a realistic cushion for the moisture issues that surface once the walls are opened up.
Basements often hide a second budget trap: building codes in many areas require egress windows in any basement space used as a bedroom or living area. These windows must meet minimum size requirements, typically a clear opening of at least 5.7 square feet, and sit no higher than 44 inches above the floor, so a standard basement window rarely qualifies without modification. Adding egress windows after the fact is far more disruptive and expensive than planning for them from the start. Cutting a new window opening into a foundation wall involves structural work, permits, and sometimes landscaping adjustments outside, since many installations require excavating a window well and grading the surrounding soil to direct water away from the new opening. Depending on wall thickness and soil conditions, this single fix can add several thousand dollars to a project that homeowners assumed was mostly cosmetic. Utility lines further complicate matters, since electrical conduit, gas piping, or plumbing runs along foundation walls sometimes have to be rerouted before a contractor can cut through. Discovering these conflicts mid-project means added engineering review and possible delays waiting on specialty subcontractors. Homeowners planning a basement conversion should ask their contractor early whether egress requirements apply to their specific project, and request a site assessment before finalizing the budget rather than after demolition has already begun.
Outdoor Living Additions That Expand Past Their Original Scope

Backyard projects have a way of growing once homeowners see the possibilities. A simple patio installation can turn into a full outdoor living overhaul once a landscaping business points out drainage issues, grading problems, or opportunities for retaining walls. What starts as a $6,000 patio quote can climb past $15,000 once these related fixes enter the conversation. Part of the challenge is that many of these “add-ons” are framed as necessities rather than upgrades. A landscaping business may correctly identify that poor drainage will undermine a new patio within a few years, making the additional cost feel less like scope creep and more like protecting the original investment. Retaining walls, French drains, and regrading work often fall into this gray area between optional enhancement and structural requirement. Other additions are purely aspirational: an outdoor kitchen, a fire pit seating area, pergolas, or landscape lighting can all be pitched as natural extensions of the same project. Each suggestion might only add a few thousand dollars on its own, but stacked together they can easily double or triple the original budget. These additions are not necessarily bad ideas, but they can quietly double a project’s cost if homeowners say yes to every suggestion without revisiting the budget. Setting a firm spending ceiling before the project begins, and requiring a revised written estimate before approving any new work, helps keep enthusiasm from outpacing the original financial plan.
Outdoor living projects that start as a simple patio or deck build often creep outward once homeowners see the space taking shape. A 300-square-foot patio becomes a 500-square-foot patio with a built-in fire pit, then a pergola gets added for shade, then outdoor lighting and a seating wall follow. Each addition seems reasonable on its own, but together they can push a $15,000 project past $30,000 before the final walkthrough. Pool-adjacent projects carry their own risks too. Homeowners adding decking or fencing around an existing pool often discover mid-project that local code requires updated fencing heights, self-latching gates, or anti-entrapment drain covers that the original system lacks. Bringing an older pool up to current safety standards can mean a trip to the pool store for new equipment, filtration upgrades, or chemical treatments that were never part of the initial estimate, adding anywhere from a few hundred to several thousand dollars depending on the pool’s age and condition. Landscaping add-ons compound the problem further. Retaining walls, irrigation lines, and outdoor kitchens are frequently pitched as “while we’re at it” upgrades once the crew is already on-site, making them feel like minor add-ons rather than separate project decisions. It helps to get a firm, phased quote so that landscaping enhancements and pool-related add-ons are approved deliberately rather than absorbed into the project by default. Ask contractors to itemize each phase separately and flag any code-driven requirements before work begins, so pool safety upgrades don’t arrive as last-minute surprises.
- Set a firm cap on add-ons before construction begins, and put it in writing as a change-order limit (e.g., no more than 10-15% over the signed contract)
- Ask for phased pricing so upgrades like outdoor kitchens or fire pits can be approved individually as budget allows
- Request a drainage assessment before finalizing hardscape plans — regrading or adding French drains can add $1,500-$5,000 if discovered mid-project
- Get quotes for pool equipment upgrades separately from construction costs, since heaters, saltwater systems, and automation can double initial estimates
- Confirm permit requirements for structures like pergolas or outdoor kitchens early, as unexpected permitting fees and inspections often stall timelines and add cost
- Clarify utility line locations before digging, since rerouting gas, electrical, or irrigation lines mid-build is a common source of surprise expenses
Garage and Flooring Upgrades That Add Up Quickly
Flooring projects seem straightforward until existing surfaces turn out to be cracked, uneven, or contaminated with oil stains that prevent proper adhesion. An epoxy garage flooring contractor may need to grind down the existing concrete or apply additional moisture barriers, both of which add cost beyond the original quote. Homeowners should ask specifically whether surface prep is included in the estimate or billed separately if problems are found.
Because epoxy flooring is sold in tiers, from basic single-coat systems to decorative flake and metallic finishes, price differences between options can be significant. Getting samples and a clear breakdown of what each tier includes helps avoid the temptation to upgrade mid-project once installation has already started.
Debris Removal and Disposal Fees That Are Often Overlooked

Homeowners frequently forget to budget for the sheer volume of waste a renovation generates. Old cabinetry, flooring, drywall, and packaging materials all need to go somewhere, and many contractors do not include full cleanup in their base pricing. Booking junk removal services separately, or confirming they are included in the contract, prevents an awkward surprise fee at the end of the project.
Disposal costs can also climb if a project uncovers hazardous materials like old insulation or lead paint, which require special handling. Getting a clear answer about who is responsible for hauling and disposal fees before work begins keeps this often-overlooked expense from sneaking into the final invoice.
- Confirm whether dumpster rental or haul-away is included in the contract
- Ask how hazardous materials are handled and billed
- Get a written estimate for any additional debris removal trips
- Clarify cleanup responsibilities for both interior and exterior debris
Contingency Planning That Protects Your Overall Budget
Even with excellent planning, most experienced contractors recommend setting aside ten to twenty percent of the total project cost as a contingency fund. This buffer absorbs the smaller surprises, an extra outlet here, a slightly pricier fixture there, without forcing homeowners to make panicked cuts elsewhere. Projects involving older homes or extensive demolition should lean toward the higher end of that range.
Tracking spending weekly rather than waiting until the end of the project also helps homeowners catch overruns early, while there is still time to adjust. A simple spreadsheet noting estimated versus actual costs for each phase makes it much easier to spot a problem area before it consumes the entire contingency fund.
Budget overruns are rarely the result of one big mistake; they usually come from a series of small, unplanned discoveries that add up fast. By anticipating the most common trouble spots, from roofing and siding to mechanical systems and drainage, homeowners can build a more realistic budget from day one. Before breaking ground on your next project, take time to ask contractors detailed questions, request itemized estimates, and set aside a real contingency fund. That preparation is what separates a renovation that stays on track from one that quietly spirals out of control.
