
A backyard renovation can transform how you live, entertain, and relax at home, but the projects that go smoothly are the ones that started with a plan, not a shovel. Before you break ground, there are structural, legal, and practical details that deserve attention so you don’t end up with costly surprises halfway through.
This checklist walks you through the often-overlooked steps that protect your budget, your timeline, and your finished yard. Take the time now to work through each item, and you’ll save yourself weeks of frustration later.
Inspect Underground Pipes and Drainage Lines
Before any digging begins, it’s worth understanding what’s happening beneath the surface of your yard. Old clay pipes, tree roots, and years of sediment buildup can create blockages that cause standing water or sewage backups once construction disturbs the soil around them. Many homeowners only discover these issues after a renovation is underway, which means extra excavation and unplanned expense.
Calling in hydro jetting specialists ahead of time can clear out buildup in your existing sewer or drainage lines and give you a clean baseline before construction starts. This service uses high-pressure water to scour the inside of pipes without damaging them, which is far gentler than mechanical snaking. Getting this done early prevents contractors from blaming each other later if a clog appears mid-project.
- Ask for a camera inspection alongside any cleaning service
- Note the age and material of your existing pipes
- Address tree root intrusion before landscaping begins
- Keep documentation in case issues resurface later
Confirm Your Property Lines and Permit Requirements

Nothing derails a backyard project faster than a neighbor dispute or a stop-work order from the city. Before you finalize any design, pull your property survey and confirm exactly where your boundaries sit, especially if you’re planning a fence, shed, or structure close to the edge of your lot. If you can’t locate your survey, check with your title company, mortgage lender, or county recorder’s office, or hire a licensed surveyor to stake your lot lines for a few hundred dollars.
Setbacks matter just as much as boundaries. Most municipalities require structures to sit a minimum distance from property lines, often 5 to 15 feet depending on your zoning classification, so a shed or deck that looks fine on paper could still violate code once it’s staked out.
Many municipalities also require permits for decks, retaining walls, or structures over a certain height, typically anything taller than 6 feet for a fence or 30 inches for a deck without railing. Retaining walls above 4 feet often need an engineer’s stamp because of the soil load they hold back. Electrical or plumbing work for outdoor kitchens, hot tubs, or lighting usually triggers its own separate permit as well.
Don’t forget to check for buried utility lines, HOA covenants, and easements that might restrict what you can build and where. A quick call to 811 before digging is free and can save you from hitting gas, water, or fiber lines. HOA design guidelines can also dictate fence height, materials, or paint colors, so it’s worth a five-minute read before you invest in blueprints.
Before you break ground, pull out your property survey or order a new one if you can’t locate it—guessing at boundaries based on an old fence line or a neighbor’s landscaping can lead to costly disputes down the road. A survey typically costs between $400 and $700, but it’s cheap insurance against having to relocate a deck, shed, or patio that encroaches on someone else’s land.
It helps to call your local permitting office directly rather than relying on assumptions from a neighbor’s project. Ask specifically about setback requirements, which dictate how far structures must sit from property lines, and inquire whether your planned addition triggers a permit at all. Many jurisdictions exempt small projects like a simple garden bed, but require permits for anything involving electrical work, plumbing, structures over a certain height, or excavation beyond a few inches deep.
Rules vary widely by city and even by neighborhood, particularly in areas with homeowners associations, which often impose their own restrictions on fence height, shed placement, or even paint colors for outdoor structures. Some HOAs require a separate architectural review process that can take several weeks, so factor that timeline into your project schedule. If you’re near a utility easement, contact your utility company as well, since digging in these zones can affect buried lines and may require additional clearance.
Taking this step early avoids the headache of tearing out work that doesn’t meet code, which can mean losing both materials and labor costs. It also protects your resale value, since unpermitted work often surfaces during a home inspection and can complicate or delay a future sale.
- Request a copy of your official property survey from the title company, county assessor, or previous owner’s closing documents
- Check setback requirements for any new structures — typically 5-15 feet from side/rear lines, but confirm exact figures with your local zoning office
- Verify permit rules for electrical or plumbing work, including whether a licensed contractor must pull the permit versus a DIY homeowner permit
- Confirm HOA restrictions on materials, height, and fence style before finalizing your design
- Call 811 (or your local utility locate service) at least a few days before digging to mark buried gas, water, and electrical lines
- Factor in easements that may restrict building over shared drainage, utility, or access areas
Evaluate Whether You Need More Living Space
Sometimes a backyard renovation is really about needing more room, and it’s worth considering whether an indoor expansion makes more sense than an entirely outdoor overhaul. Additions such as a sunroom, screened porch, or expanded kitchen that opens to the yard can blend indoor and outdoor living in a way that a patio alone cannot. This is especially true if your goal is year-round usability rather than a space you only enjoy a few months a year.
Thinking through this early matters because additions often affect your yard’s grading, drainage, and available square footage for landscaping. If you wait until after the patio or pool is installed, you may find there’s no longer room for the addition without expensive rework. Talk to a designer about how an addition might integrate with your renovation plans before committing to a final layout.
- Consider how an addition affects sun exposure in the yard
- Factor in foundation work and its impact on grading
- Decide if you want indoor-outdoor flow through large doors
- Budget separately for addition costs versus landscaping costs
Plan Shade and Shelter Structures for Vehicles and Equipment

If your backyard renovation includes space for parking, storage, or a workshop, it’s worth thinking about durable shelter options early in the design process. Metal carports have become a popular choice for homeowners who need weatherproof coverage for vehicles, boats, or equipment without the cost of a full garage. They’re relatively quick to install and can be customized in size and color to match your home’s exterior.
Placement matters just as much as the structure itself. You’ll want to consider how a carport affects sightlines, drainage patterns, and the flow of foot traffic through the rest of the yard. Positioning it too close to a fence line or drainage swale can create problems down the road, so this is a detail worth sketching out on your site plan before construction begins.
- Choose a location with proper drainage away from the structure
- Confirm whether a permit is required in your area
- Match the roofline style to your home for a cohesive look
- Leave clearance for vehicle doors and equipment access
Upgrade Outdoor Comfort Systems Before Hardscaping Begins
If your renovation includes an outdoor living area, patio kitchen, or converted garage space, this is the time to think about climate control. Heat pumps have become a favorite option for homeowners extending their living space outdoors because they handle both heating and cooling efficiently in one unit. Installing the necessary lines and electrical work before you pour concrete or lay pavers saves you from cutting into finished hardscaping later.
It’s also worth having a contractor assess your home’s existing system capacity if the new space will be connected to it. Adding square footage or an outdoor-adjacent room can strain a system that was sized for the original house. Planning this out now means comfort won’t become an afterthought once the space is finished.
- Map out utility lines before excavation starts
- Ask about energy efficiency ratings for outdoor-rated units
- Consider zoning controls if the space connects to your home
- Schedule installation before final hardscape work
Choose the Right Ground Cover for Your Lawn Areas

Once structures and hardscaping are mapped out, it’s time to think about what will actually cover the remaining ground. Grass installation is one of the last major steps in a backyard renovation, but it needs to be planned early because it affects irrigation placement, grading, and soil preparation. Sod offers a quicker, more immediate result, while seeding is more budget-friendly but requires patience and consistent watering.
Soil quality often gets overlooked in this stage, yet it’s one of the biggest factors in whether new grass actually thrives. Have your soil tested for pH and nutrient levels before laying sod or spreading seed — most home improvement stores sell simple test kits for under $20, or you can send a sample to your local agricultural extension office for a more detailed analysis. Most turf grasses prefer a pH between 6.0 and 7.0, so if your results come back outside that range, you’ll need to amend accordingly: lime raises pH in acidic soil, while sulfur lowers it in alkaline soil.
Beyond pH, pay attention to nitrogen, phosphorus, and potassium levels, since deficiencies here often show up as patchy, yellowing grass months after installation. Compacted or clay-heavy soil is another common culprit, and working in a few inches of compost or topsoil before planting can dramatically improve drainage and root development. If your yard has a mix of sun, shade, and low-lying wet spots, consider testing multiple areas separately rather than relying on one sample for the whole property.
Skipping this step is one of the most common reasons new lawns struggle within the first year, often forcing homeowners into costly reseeding or sod replacement. Spending an extra week on soil prep before renovation day is a small investment compared to redoing the entire lawn a season later.
- Test soil pH before choosing a grass variety — most turf grasses thrive between 6.0 and 7.0, and a $15 home kit or county extension test will tell you if you need lime or sulfur
- Match grass type to your region’s climate and sun exposure — cool-season grasses like fescue and bluegrass suit northern yards, while warm-season options like Bermuda and zoysia handle southern heat and drought better
- Check how much daily sun each area gets, since shady side yards often need a fescue blend or groundcover alternative instead of standard sod
- Plan irrigation lines before the final grading pass so sprinkler heads and trenches don’t disturb newly placed soil or damage fresh sod
- Position irrigation zones to match sun and shade patterns, grouping thirstier sun-exposed grass separately from shaded, lower-water areas
- Schedule installation for the appropriate season — early fall works best for cool-season grasses, while late spring suits warm-season varieties
- Avoid seeding or sodding during peak summer heat or hard freezes, both of which stress root establishment and increase failure rates
Protect Indoor Textiles From Construction Dust and Debris
Backyard renovations create more indoor mess than most homeowners expect, especially when contractors are moving in and out through the same doors day after day. Fine dust from concrete cutting or soil disturbance settles into carpets and upholstery faster than people realize. It’s worth covering high-traffic indoor areas with plastic sheeting or old sheets for the duration of the project.
Once the heavy work is finished, it’s a good idea to schedule a deep clean rather than assuming regular vacuuming will handle it. Professional rug cleaners can extract embedded dust and debris that regular vacuuming misses, especially in wool or high-pile rugs near entry points. This is particularly worthwhile if the renovation tracked in dirt over several weeks rather than a single day.
- Seal off entry points with plastic sheeting during demolition
- Vacuum high-traffic areas daily during construction
- Schedule deep cleaning after the project wraps up
- Pay special attention to rugs near doors leading outside
Address Wildlife and Pest Concerns Before Construction Starts
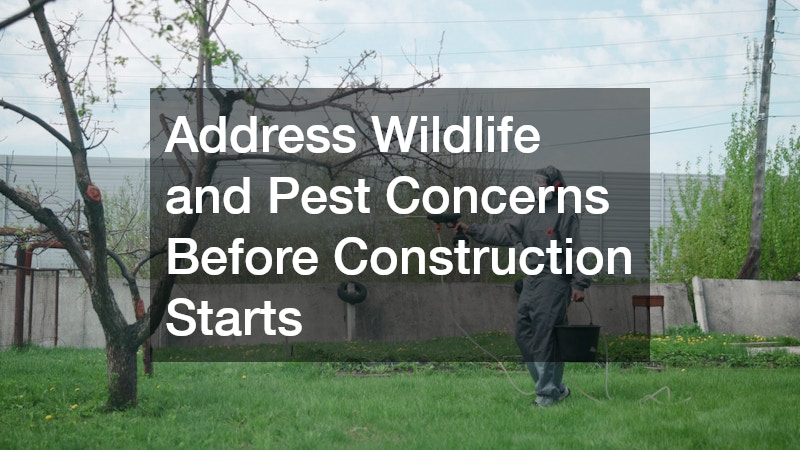
Disturbing soil, removing overgrown vegetation, or tearing out old sheds can stir up more than dust. Animals like groundhogs, snakes, and rodents often nest in untouched corners of a yard, and disturbing their habitat mid-project can create safety issues for workers and delays for you. It’s worth walking your yard for signs of burrows, nests, or droppings before any demolition begins.
If you spot signs of an active den or nest, contacting wildlife control and removal professionals before construction starts is far safer than trying to relocate animals yourself. They can identify the species involved and handle removal in a way that complies with local wildlife regulations. This step is especially important if your renovation involves removing a shed, deck, or dense brush where animals commonly take shelter.
- Walk the yard for burrows or nests before demolition
- Avoid sealing entry points until animals are confirmed gone
- Check for legal protections on certain species in your area
- Schedule removal before excavation equipment arrives
Handle Existing Structures and Plumbing Fixtures With Care
If your renovation involves an outdoor shower, pool house, or exterior bathroom, don’t assume old fixtures need full replacement. A bathtub repair company can often restore a damaged tub or basin rather than requiring a full teardown, which saves both money and landfill waste. This is worth exploring even for fixtures you plan to relocate, since some can be professionally reglazed or patched on-site.
When it comes to removing old wood structures like a pergola, fence, or raised bed, not everything needs power tools. Hand sawing is often the safer, quieter choice when working near underground utility lines, delicate landscaping, or shared fence lines with neighbors. It also gives you more control in tight spaces where power equipment could cause accidental damage.
- Get a repair quote before assuming replacement is necessary
- Ask about on-site reglazing options for tubs and basins
- Use hand tools near utility lines or shared property edges
- Salvage usable wood or fixtures where possible
A successful backyard renovation comes down to the groundwork you do before construction ever begins, from checking pipes and permits to planning shelter, comfort systems, and lawn care. Working through this checklist step by step will help you avoid costly mid-project surprises and keep your timeline on track. Take it one section at a time, gather quotes where needed, and you’ll be in a strong position to move forward with confidence once the first shovel finally hits the dirt.
